Thursday, December 22, 2011

minty sweets and holiday treats!

i finally finished the fall semester!  it seemed like one of the longest 4 1/2 months of my life (for various reasons), but i made it through with flying colors.  four classes, straight a's and one brand new language later, i am finally home and enjoying the holidays with my family.

one of our great many traditions in my house is making christmas candy to give away as gifts.  i was originally going to blog about the best, richest, smoothest, and most chocolatey fudge in existence, but my mother insisted it was a secret family recipe and my camera was not welcome in the kitchen that afternoon. we compromised and i talked my way in to photographing and sampling some decadent peppermint bark.  it is super easy to make and turn in to fabulous additions to the regular spread of christmas desserts.  let's get started!

for the peppermint bark, you can really choose whatever kind of chocolate you personally like.  the traditional combination is milk chocolate and white chocolate, but my family are dark chocolate lovers so we swapped the milk for dark.  i despise white chocolate but others seem to really enjoy it so we kept it in this batch (mostly because its a beautiful contrast against the dark chocolate!)  the only other ingredients you'll need are a little vegetable oil, peppermint oil (not extract-- i'll show you why later!) and crushed candy canes or peppermint candies.

the shopping list:
-one bag (12 oz.) dark chocolate chips
-one bag (12 oz.) white chocolate chips
-2 tbsp. vegetable oil (or any flavorless oil)
-1/2 to 1 tsp. peppermint oil (NOT EXTRACT!)
-crushed peppermint candies or candy canes

first thing's first: let me tell you about the terrible, terrible things that can happen to chocolate when it mixes with water.  this is a warning in advance so that you don't lose a whole entire batch of chocolate because it seized up!  water and chocolate DO NOT MIX.  even so much as one teensy weensy drop in the bowl you're using to melt in, or a damp bowl that's just been cleaned can ruin a batch of chocolate in no time flat.  make sure that whatever vessel you choose to melt in is perfectly dry and that no water comes in contact with the chocolate at any point!  you don't want your chocolate to look like this, but it should look like this instead!

okay so to start, grab a 9x13 inch baking sheet and either grease it with a little butter or spray it with nonstick spray (just to make sure the bark won't stick when you're all done).  take a large glass bowl and add your dark chocolate chips and one tbsp of vegetable oil (to keep the chocolate shiny!).  pop it in the microwave in 30 second increments at 3/4 power (gently melting), and stir every 30 seconds until the chocolate is all melted.  at this point, add your 1/2 tsp of peppermint oil* and stir together.

**side note: remember how we just talked about chocolate not liking water?  well if you wanted to make your chocolate pepperminty and added peppermint extract (which is like water) to your bowl, it would act just like water and seize up your beautiful dark chocolate.  instead, any baking supply store (and even some supermarkets now!) have peppermint OIL which is much stronger but in an oil form so it won't affect your chocolate!

when the chocolate is melted and the peppermint has been added, taste and see if its pepperminty enough for you.  remember, the white chocolate won't get peppermint flavoring so the dark chocolate needs to be pepperminty for both!  your chocolate will look like this:


once the chocolate is sufficiently pepperminty, pour it in to your buttered pan and smooth it out evenly with the back of a spoon or an offset spatula which is my favorite cooking utensil in the world and everyone should have one because they are the best okay sorry :)


put the dark chocolate in to the freezer to harden while you melt the white chocolate.  ideally the dark will chill for 20 minutes to get hard (unless you want to swirl your bark, in which case you'll need both chocolates to be liquid in order to make this design-- if you like this, pour the white on top of the still warm dark and swirl with a toothpick!)


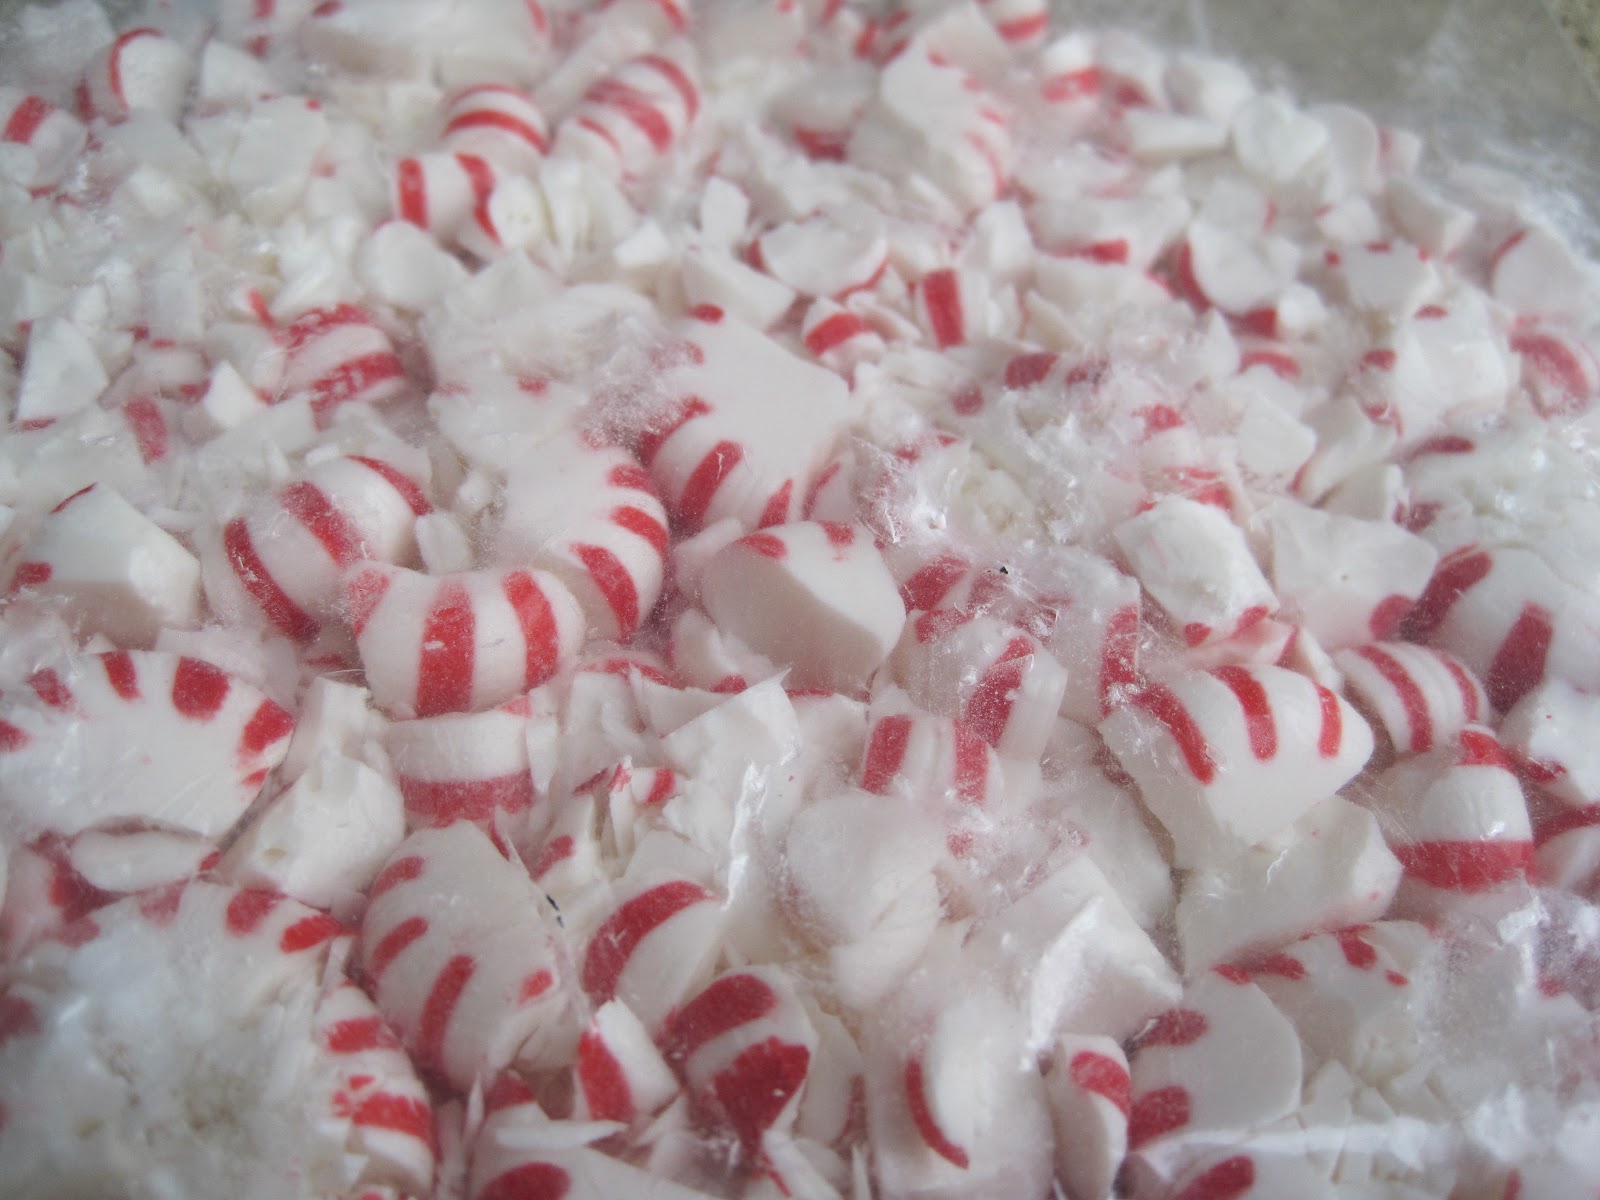
melt the white chocolate the same way as the dark (no water, remember!) but this time don't add the peppermint oil or else the bark will be too strongly flavored.  while the white is melting and the dark is chilling, crush up some candy canes or peppermint candies in to small and larger chunks to sprinkle on the top of your white chocolate.  get this ready in advance because once you pour the warm white chocolate on the cold dark chocolate, the white will firm up almost instantly when it hits the cold dark chocolate and the peppermint candies won't stick when it sets!  my crushed pieces looked like this:


next, take the melted white chocolate and pour and spread it over the chilled dark chocolate.  while its still wet, sprinkle the white chocolate with the crushed candy pieces making sure to tap them in lightly with the palm of your hand to make sure that they stick. 


chill this entire pan in the fridge for an hour before you take it out and break it in to pieces.  you can either snap pieces off with your hands, or sometimes its even more fun to pick up the entire bark and drop it down again on to the pan.  it should shatter in to nice pretty chunks!  store this in the fridge until its time to give it away or snack on it during the holidays.  i hope you enjoy it!


happy holidays to you and yours!

Thursday, November 17, 2011

apple pie bars? yes please!

i love autumn!  i know i've said it before, but its my all time favorite season and i love the flavors and colors that go along with it.  pumpkin, apples, cinnamon, cloves, nutmeg... ahhhh.  it puts me in a good mood just thinking about it :)

a few weekends ago was the 50th anniversary of the oyhenart family in the united states, so my aunt planned what i began to call the "oyhenartextravaganza" for saturday night.  i had a free weekend before the craziness of concert week with the virginia belles, so i grabbed a train home and spent the weekend in fairfax.  when i got home, my mom informed me that we were responsible for bringing a main dish and a dessert-- and that she didn't want to cook either of them, so it was all up to me.  best news i'd heard in a long time!  i had free reign of our beautiful kitchen plus all the kitchen gadgets, so i was over the moon happy and ready to plan the meal.

for the main course, i made a beautiful chicken and merlot pot pie in a casserole dish and latticed the pie crust right on top.  it is a great make-ahead dish and we popped it in the warming drawer when we got to my aunt's house and it was ready when we were!

but, the dessert was my crowning glory.  i had been looking around for fall apple recipes and found an awesome food blog with the recipe for "szarlotka", or polish apple pie bars.  with a soft cakey bottom, a thick layer of roasted apples, and a crumble top-- i was sold.  you'll want to make these all year round, but they are absolutely perfect for autumn!

for the cake/biscuit base:
-1/2 c. butter
-1 1/4 c. sugar
-1 egg and 1 egg yolk
-1 1/4 c. flour
-1 1/4 tsp. baking powder
-1 tbsp. milk

this is a basic biscuit base, so cream the butter and sugar together with a hand mixer or a fork, add in the egg and egg yolk, and finally the milk.  mix until smooth and combined.  next, add the flour and baking powder (slowly) until everything is incorporated.  it should look like this:


here's what you'll need for the filling:
-8 granny smith apples
-2 tablespoons butter
-2 tablespoons sugar
-healthy dash of cinnamon

first, peel (painstakingly) and dice up all 8 granny smith apples.  its totally worth it, i promise!  your enormous pile of apples will look like this:


toss them in a large pan with the 2 tablespoons of melted butter and add the sugar and a large dash of cinnamon.  i like mine nice and cinnamony, so i added about a tablespoon.  but adjust this to your taste!  let the apples cook down on low, stirring a bunch, until the apples break down and get nice and soft.  here's the before and after:


and finally for the crumble:
-1 1/4 c. flour
-3/4 c. sugar
-1/2 c. butter
-1 tsp cinnamon
-1/2 tsp nutmeg

cube the butter (make sure its super cold!) and add the sugar, flour, and spices right on top in a bowl.  using your hands-- yes, your hands!-- combine all the ingredients together until the butter makes everything in to nice, big crumbles.  looks good, no?


and now for the assembly:  
line a large glass pan (i used a 9x13) with parchment paper (or spray it with non-stick spray) and spread the biscuit batter in the bottom.  take care to spread it all the way out to the edges and keep the batter in a nice even layer.  
 

bake off the bars in the oven for 45-60 minutes at 325 and let them cool completely before you cut them. if you don't let them cool all the way (which, believe me, is difficult), then they won't come out in one piece.  so let them set!  once they're ready, use a sharp knife and slice out a perfect little square.  serve these with a little scoop of vanilla ice cream or just pick one up and pop it in your mouth! 


these were a big hit-- i hope you enjoy them!

Saturday, October 1, 2011

sweeeeet corn tamale cakes


in my new apartment with my new (amazing) roommates, we decided that since all of us like to cook, we'd have apartment dinners twice a week on tuesday and thursday nights.  the four of us switch off so we each end up cooking once every two weeks.  it saves each of us some money and is a fun tradition we have together.  for my night the other week, i decided to make sweet corn tamale cakes with a few delicious salsa toppings, along with spicy black beans.

the inspiration for this meal was a cheesecake factory appetizer that my mom and i loveee to order every time we go.  there are countless websites that try to copy the myriad of dishes that they have on their menu, so i looked this one up and tried it out.  the corn cakes are just a softer version or cornbread and the pico de gallo and green tomatillo salsa on top are a perfect complement to the creamy cake.  i wanted something spicy on the side so i made up a pot of delicious black beans.  the meal is a little time consuming to prepare, but i made the cakes a day ahead of time, and just had to pop them in the oven and whip up the salsas just before dinner.  but this meal is worth the trouble, i promise!


first for the cakes, here's what you need.  this makes 12 cakes (2-3 per person)
-4 1/2 cups frozen corn
-6 tbsp. sugar
-1/2 c. butter, softened
-1/2 tsp. salt
-4 tbsp. flour
-1 1/4 c. masa harina (which is corn flour)

take the frozen corn and in a food processor, grind it down nice and fine.  do this in batches so that the corn doesn't thaw before you grind it (its much easier when its frozen).  here's what you're looking for:


in the mixer, add all the corn, butter, sugar and salt and pulse until everything is combined.  at this point, the corn will have defrosted so your mixture is going to be more liquidy.  pour the corn mixture into a large mixing bowl and stir in the corn flour slowly.  sprinkle in the flour at the very end only using as much as you need to tighten up the corn cake dough.  mine looked like this:


with your dough complete, you can either form the cakes and put them right on a greased baking sheet, or place them between wax paper to refrigerate.  i made the corn cakes about 2/3 inch thick and about the width of a soup can.  after i formed each cake, i dusted them with flour so they weren't as sticky.  these are pretty rustic, so don't worry if they aren't perfectly shaped!

bake these at 400 degrees for 20 minutes, flip, and bake for 5-7 more (or until golden brown).  be careful not to overbake these or they will get tough!  here are the beauties when they come out of the oven:


and now to the toppings:

check out one of my old posts for a recipe for my pico de gallo salsa.  

for the green tomatillo salsa, i used three large tomatillos (these papery tomatoes if you haven't heard of them!), sliced and added to a food processor with 1 4 oz. can of mild (or medium) green chiles, a handful of cilantro leaves, 1 1/2 tsp. ground cumin, and a chopped green onion.  blend until combined and mostly smooth.  this salsa is incredibly bright and fresh-- perfect with the rich corn cakes.

lastly, the spicy black bean side dish.  this is my own creation made up as i went along, and it turned out deliciously.  its super simple, here's what you need:

spicy jalapeño black beans:
-2 cans black beans, rinsed
-1/2 can of fire roasted tomatoes
-1 jalapeño, seeded and diced
-1/2 vidalia onion, diced
-1 clove garlic, minced
-2 tbsp olive oil
-chili powder
-cumin
-salt and pepper

in a little bit of olive oil, sauté down the onion, garlic, and jalapeño until they are soft.  then, add the drained and rinsed black beans to the pot along with half a can of the fire roasted tomatoes.  stir until combined.  when warmed through, add 1 tsp or so of cumin, 1 tsp of salt, and 1/2 tsp of chili powder.  cook until all the flavors are combined (about 10 minutes or so).  the wonderful thing is that the black beans start to break down a little and the final product is a nice mixture between refried beans and baked beans.  here's what it looks like:


to assemble the final meal, my suggestion is to put the tomatillo salsa on the bottom of the plate, two corn cakes next, and then the pico de gallo right on top.  serve with a dollop of sour cream (or make it fancy with some fancy chipotle mayo or sour cream!) and a nice serving of black beans on the side.


these were perfect for a light mexican dinner and totally worth the trouble!  i hope you enjoy them as much as we all did!

Wednesday, August 17, 2011

jag älskar pannkakor

as a little diversion from my "kitchen basics", i would like to share another delicious swedish recipe.  this one is certainly not my own creation, but instead a recipe tried and true in the swedish culture-- pannkakor.


pannkakor, or "pancakes" in swedish, are very much like the french crepe, but are traditionally eaten sweet and not savory. some people like them with all the fixings: butter, sugar, jam, and creme; some just like them with a sprinkling of sugar.  however you like them, pannkakor are simple to make, filling, and very, very yummy.

you only need a few things:
-2 eggs
-2 1/2 c. milk
-1 1/4 c. flour
-1 tsp. salt
-melted butter (for the pan)

to make the batter, mix the eggs, milk, and salt together in a bowl with a whisk.  slowly add flour, whisking the whole time to avoid lumps.  whisk until smooth.  the batter should be fairly thin.

to cook the pancakes, add a little melted butter in a small skillet so that it lightly coats the bottom.  with the heat on medium to medium high, add a small ladle full of the pancake batter to the pan.  be careful not to use too much; the batter should *only* coat the bottom of the pan.  swirl the pan to make sure the batter is in an even thin layer.


these pancakes cook quickly, just keep and eye on the batter until it firms up and starts to pull away from the sides of the pan.  then, using a flexible spatula, loosen up the pancake and flip it over.  make sure the heat is fairly low because the pancakes will be thin like crepes and can burn easily.

once flipped, take the pancake out and lay it on a plate, and repeat the process until you use up all the batter.  you should be able to make about 15 pancakes with one batch.


i love pannkakor warm just as much as cold, so serve them right away and enjoy the leftovers from the fridge.  here are my favorite ways to eat these delicate swedish delights:

plain with a sprinkling of sugar (but rolled up!):


sugar and a side of strawberry jam:


or with a smear of nutella:


i hope you enjoy these as much as i do!

Friday, July 8, 2011

kitchen basics: how to shop the market


i am back from my scandinavian adventure and ready to share the next installment of kitchen basics!  this is arguably the most important post in this series because knowing how to prepare for the market, what to get, and controlling how much you spend on groceries are key for most shoppers and chefs.  you need to get the right ingredients, but not break the bank doing it.  let me show you how!

first of all, there is a little prep involved.  i know this is not something young-adults like to do (myself included sometimes), but if you take the time to make a list and do an easy peek for coupons, it can make all the difference in the world.

tip number one:  make a list 
never go in to a market without one.  if you do, you'll end up filling your basket with crap that you don't need (that is generally way overpriced).  here are some simple steps:

1. find your favorite grocery store in town.  i do not recommend a place like 'whole foods' for your everyday grocery shopping needs because it is a specialty market, and you'll pay specialty prices.  places like safeway, kroger, wegmans, or bloom have inexpensive basic ingredients and you can scout out the one with the best produce selection.  these stores also generally have customer rewards programs that give you great deals on the things you buy the most.

2.  go online (or to the newspaper circulars if you get those anymore!) and browse around the weekly ads on your store's website.  see whats on sale.  you'd be surprised how many discounts are available for the store brand instead of the brand-name products.  they are often EXACTLY the same product, but with different labels!

3. check electronic coupons.  i know that a lot of stores are doing this nowadays-- electronic coupons.  with your bonus card, go online and see what coupons you can just load up to your card.  no clipping required!  put these items on your list and you'll get the discount right at the check out counter.

4. use the weekly ads and electronic coupons to help brainstorm things to get at the grocery.  i like to think in categories when i make my lists:
          -breakfast:  what do i usually eat?  oatmeal?  OJ?  eggs?  cereal?  milk?  
          -lunch:  sandwich items, bread, soup, frozen meals, salad, fruit, etc.
          -dinner:  --> we will revisit this soon :)
          -snacks:  pretzels, baby carrots, fruit, nuts, cheese, crackers, etc.
          -household items:  TP, paper towels, dish soap, shampoo, etc.

with categories in mind, you can look at what you have in your pantry and see what you need to get.  plan ahead and give yourself a few options, but don't go overboard!  try to pick things that can be used for multiple meals.  for example, if you like english muffins for breakfast but are worried about eating all 6 before they go bad, think about using them for mini pizzas for dinner!

tip number two: give yourself options
the question i get asked the most is what the heck am i going to have for dinner?  and how do you shop for dinner things when you dont know what you want to make?

simple.  you don't need to know exactly WHAT you want to eat, just have an idea of what kinds of things you usually eat and have them around.  let me clarify with a scenario:

"charlie" is a college student who needs to cook for himself.  he has a limited budget and is in desperate need of going grocery shopping.  ordering pizza and going out for chipotle is proving to be more expensive than he can handle, so making his own dinner is the cheapest option.  as he is a boy, he generally likes to eat meat and carbs for dinner (aka a hamburger, steak, chicken, potatoes, pasta, etc).  but, he doesnt know exactly what he wants to eat for dinner every night.  after a little bit of looking at weekly ads, charlie finds out that his local market has great deals on chicken and steak that week.  potatoes are always a cheap option and pasta is on sale for a dollar a box.  he know he should have some kind of fruit or vegetable and decides to get a few apples since he has an electronic coupon.  his "splurge" items are cheese and sour cream because they are not "on sale", but he chooses the store brand and saves some money there.

charlie walks out of the store with a pound of chicken breasts, a few ounces of a cheaper cut of steak, two baking potatoes, a box of pasta, a jar of spaghetti sauce, four apples, shredded cheddar cheese, sour cream, english muffins, and some barbeque sauce.  by choosing the store brands, looking for the sale items, and applying his coupons, charlie spent about half of what he would have spent if he had gone in to the store without a plan.  with his ingredients, he can make at least four nights worth of dinner plus leftovers for lunches the next day!

(if you are wondering what he can make, here are just four possibilities: barbeque chicken with mashed potatoes, steak and loaded baked potatoes, italian chicken with pasta, mini steak and cheese pizzas.  plus leftover ingredients!)

tip number three: have a snack before you shop
another mistake people make is going to the store hungry.  when you're hungry, everything looks good and you start to impluse-buy.  RESIST!  snack before you come to the store so that you stick to your list.  but its not the end of the world if one thing sneaks in your cart :)

tip number four: wait for things to go on sale, then stock up
this might be the most difficult tip, but if you're on a budget, look for alternatives instead of buying exactly what you want if its not on sale.  if you are looking for fruit and the peaches look really good that week, but they are almost two bucks a piece, skip them and pick the grapes that are on special that week.  wait for the peaches to go on sale.  stores rotate sales frequently, so don't worry if what you want isnt on sale at the moment.  it will be soon!

this rule does not apply absolutely all the time, however.  if you are planning on making grilled chicken kebobs with roasted vegetables, you might can certainly swap out red bell peppers for green ones, but you can't really compromise on the chicken.  just look for the best deal, but don't say "no" just because it isnt on sale.  work with your budget!

on that note:  when your desired item does go on sale, if it is something that you use frequently (meat, mostly), then stock up on it.  get twice as much as you normally would buy and when you bring it home, package it up in separate baggies and toss it in the freezer.  that way, you have chicken or steak or seafood whenever you need it-- right at your fingertips.

tip number five: be creative!
you know what you like to eat.  be creative!  get a bunch of ingredients and start experimenting.  i like to buy all kinds of vegetables at the beginning of the week (usually things like zuchinni, mushrooms, kale, tomatoes, and bell peppers) and make stir fry, roasted vegetable side dishes, or pasta salads with fresh veg.  together with the staples in my pantry (which you should check out here), i can make countless meals with just a few ingredients!

---

don't be afraid of the grocery.  just look at your wallet, think about what YOU like to eat, do a little prep, and you're golden.  my favorite part of the whole shopping trip is scanning my bonus card after everything is scanned and watching that total drop down, down, down.

ahhh, isn't shopping fun?  :D

Thursday, June 23, 2011

kitchen basics: a guide for the intimidated chef!


the other day, my friend greg and I were catching up over ice cream, talking about the past semester.  we go to different universities with very different food options, so its fun to chat about what we ate.  UVA is well known for having horrendous food and VT is equally as well known for providing sublime food experiences for its students.  the contrast is really astounding.  but, alas, it is expensive to keep a meal plan (which i ditched as soon as humanly possible) and greg said that he would be making his own meals, for the most part, in his apartment this upcoming year.  poor thing also confessed that he doesn’t know how to cook and felt sort of lost in the grocery store. 

does this sound like you?  are you terrified of the kitchen?  do you resort to eating cereal at all hours of the day just because you are unable to cook something different? 

don’t worry!  this next series of blog posts will focus on important tips and tricks in several useful categories that will take you from a scared to confident in the kitchen!  i’m not going to throw a bunch of food-jargon at you and you wont have to buy any fancy equipment.  this is specifically aimed at the college-kid who has limited a) time, b) budget, and c) interest. 

the goal of these posts is to zero in on some basic skills that will give you more freedom in the kitchen.  i’ll teach you how to shop the grocery store, how to stock your fridge with everything you’ll need for a full two weeks (on a budget!), how to cook up any kind of meat, how to take ingredients and make an actual meal out of them, what to eat with that meat, how to bake (!), and all sorts of other useful things. 

by the end of this series, you will be able to go in to a market and get the essentials that will allow you to make endless combinations of new and exciting lunches and dinners-- without relying on ramen soup or chipotle every night! 

if there is something in particular you have always wanted to know how to make, or if you have a food problem that you’d like an answer to, feel free to email me (koyhenart@gmail.com) or drop a comment!  i’ll have a q&a post as soon as i compile a good chunk of questions.

and now, OFF WE GO!

Tuesday, June 7, 2011

bakery shmakery. homemade rosemary focaccia is the way to go!

someone asked me in the midst of the Atkins craze a few years back if, being the foodie that i am, i would ever consider doing a low-carb diet.  my response was a loud outburst of laughter and then i answered with a heartfelt "no".  my reasons are twofold:

1) i really really don't like to eat chemically altered food, and fake sugars top that list.  i don't trust things that emulate natural flavors.  to me, sugar is sugar and should be enjoyed in moderation, not in a "substituted" form.  i will choose a regular Coke over a 'diet' or 'zero' one million percent of the time (and i am not a big soda-drinker at all, so that's where the moderation thing comes in).  but things like splenda, sweet and low, and even stevia are big no-nos for me.  low-carb things tend to use a lot of these fake sugars because they are free of calories-- but the trade off is a truckload of chemicals.

2), i love pasta, rice, potatoes, and bread.  a lot.  again, i eat them in moderation and select the whole-grain options, but i just couldn't see myself throwing them out of my diet.  while we are on the topic of bread-- there are few things in this world that i love more than a fresh-out-of-the-oven roll or loaf of bread.  as my mother has always said, "bread is just a vehicle to get the butter to your mouth", but i believe the opposite.  the bread itself is the prize.

this brings us to the delicious recipe of the day:  homemade rosemary focaccia bread.  for those of you who are so unfortunate as not to have tasted this kind of bread, it is full of olive oil, topped with big flakes of sea salt, and fresh rosemary.  it is the perfect bread for panini sandwiches, or to dunk in a little bit of table-olive-oil before an italian feast-- or really just to eat on its very own.  it has a rich flavor and a dense consistency, and almost nothing in the bread world can beat it.  so i say "thhhbbbbbbtttt" to Atkins and invite you to enjoy this scrumptious recipe!

i searched far and wide for a focaccia that had the right balance of olive oil in the dough.  some breads can get really soggy and (as good as olive oil is) when you can taste the actual oil instead of just taste the flavor, you know you went too far.  this is adapted from Anne Burrell's go-to recipe.

here's what you'll need:
-1 and 3/4 c. of warm water (warm to the touch-- not boiling hot!)
-1 tablespoon of sugar
-1 package dry active yeast
-5 c. AP flour (all-purpose)
-1 c. good olive oil (1/2 c. for inside dough, 1/2 c. for top)
-1 tbsp. salt
-coarse salt (for the top)
-1 head garlic, in tact
-1 sm. bunch fresh rosemary

the first step is to proof the yeast, which should be nothing new by now (to all my trusty readers!).  in a large bowl, dump the yeast, warm water, and sugar (to feed the yeast) and mix around gently with a spoon.  this mixture needs time to rest (about 15 minutes) until you can start to actually smell the yeast activating.


while this proofs, you can start to get the dry ingredients together.  combine your 5 cups of AP flour in a large bowl (sift it if you'd like) and add the 1 tbsp. of salt.  mix well, making sure the salt is well dispersed.  by the time the yeast is proofed, it should look like this! it smells to me like the beginnings of warm bread, or a yeast-y beer, and will have formed a layer of foam.


with the super awesome bread hook attachment to your hand/stand mixer, combine the flour mixture, yeast mixture, and 1/2 c. of your olive oil.  if you don't have a bread hook, a spoon and some patience will do just fine :).  mix until the dough is no longer lumpy (could be about 4 or 5 minutes) and gets a smooth consistency.


if your dough is still a little sticky, you can always add a few more sprinkles of flour when you turn it out of the bowl on to a floured surface.  knead the extra flour in a few times and you should be all set.


in the same bowl (wipe it out a little to get the excess flour off), coat the sides and bottom with the rest of the olive oil (about 1/3 c.).  add the ball of dough back in to the oiled bowl, cover tightly, and let it rest for at least an hour.  this is the first proofing.  the dough will have about doubled in size when you check on it later.

after it has proofed once, dump the risen dough on to an oiled baking sheet (or something long and rectangular with sides like a jelly roll pan) and start to spread it out to the sides.  this is where focaccia gets its signature "craggy" look-- be rough with it when you spread it out!  take your fingers and punch holes in it as you stretch it.  if you don't make actual holes, the dough will rise and smooth out.  the goal is to puncture the dough.  it should look like this:


now its time for the final proofing: take a tea towel and cover the pan.  let it rise again in a warm place for another hour.  when you check on it later, it will still be craggy but much puffier, like this:


now for the fun part-- the topping.  this is my favorite way to flavor the focaccia, but feel free to mix it up and add your favorite things!   i reserved a few tablespoons of olive oil and drizzled it over the top of the dough.  i then took an entire head of garlic (peel on) and sliced it in half across the center (like cutting a roll for a sandwich) and with the cloves exposed, rubbed them directly on to the focaccia dough.  this adds a very mellow garlic note.  next, take a sprig of fresh rosemary and chop it in to rough and pretty pieces.  sprinkle this all over the top of the dough, pushing it in slightly.  the last touch is a sprinkle of fresh sea salt.  yummmmmm.


toss the dough in to a 425 degree oven for around 20 to 30 minutes, rotating every 10.  the oiled baking pan almost fries the dough on the bottom and the screaming-hot oven crisps the olive oil on the top making it golden brown and delicious!

after it has cooled completely (if you can wait that long after being teased by the heavenly aroma for half an hour), either use the loaf immediately for sandwiches or anything else your heart desires, or seal it up very tightly in a ziplock bag for later use.  the bread also freezes beautifully (i'd suggest cutting it in to sandwich size pieces first so you can just pull it out when you need it!) but will stay fresh for up to four days in the fridge.

now for my decadent masterpiece:


see?  wasn't that easy as pie?  now i bet you will never go buy focaccia bread at a bakery again.  plus, your kitchen will smell wonderful each and every time you make it yourself :)

stay tuned for my next post where i will showcase this beautiful bread as the base for a prosciutto pizza and a caprese panini.

buon appetito!

Thursday, June 2, 2011

what's better than one cookie? a cookie inside another cookie!

firstly, let me apologize for my near month hiatus.  there is really no excuse, so i will fabricate one.  i got in a fight with this huge dragon and just now got out of the hospital.  yep, that’ll do.
____

i was reading all my favorite food blogs one day towards the end of the semester (when i probably should have been studying for finals) and a particularly interesting food photo caught my eye.  it was simple but striking: a chocolate chip cookie with a Oreo nestled in the center.  the center was revealed by the photographer’s “service charge” i assume; one clean bite.  even for someone who does not have much of a sweet tooth, i wanted one of those gooey confections immediately.

lucky for me, my best friend was coming to stay with me for a few days.  this was the perfect recipe to try at the exact right moment-- like the Cooking Gods had aligned the stars.

Bonnie and i decided to go ahead and make the classic CCO (chocolate chip oreo) but we also wanted to play around with other combinations.  so we got some sugar cookie mix and Grasshopper cookies (like a thinner thin mint).  what we really wanted were tagalongs, but alas it was not girl scout season. 

i didn't bother to make my own cookie dough for this recipe because the real point of these cookies is to see how crazy you can get.  but it’s totally up to you-- make your own if you would like!  

we whipped up a batch of chocolate chip and a batch of sugar cookies (a bag of the mix, an egg, and a stick of butter) and made sure to refrigerate the dough for about half an hour before we used it.  this is actually important because if you are working with warm cookie dough it will spread like crazy in the oven and you will end up with stuffed cookies that look like UFOs.  i should also mention that this was a little bit of trial and error for us, so don’t worry if they don’t look perfect.

while the dough chills, get your “inside” cookies ready!  we used the Oreos and Grasshoppers.  but if you would like a different kind, go for it.  you could even put in those fun sized candy bars.

to make the CCO’s, take a small ball of the chocolate chip dough and press it in to the oreo on all sides.  you don’t want to use too much- just enough to cover the cookie completely (it should be a fairly thin coating).  you can think of it this way:  take as much dough as you would to make a regular sized chocolate chip cookie and stretch it around the oreo.

place the cookies about 6 to a big baking sheet (as they will spread some, so be careful!) and pop them in a 350 degree oven for between 8 and 12 minutes.  but definitely keep and eye on them so that they don’t burn!

when they come out, let them cool for about 5-10 minutes before you cut in to them.  this way they will keep their shape and not crumble!  Be patient :)


while these cool, take the sugar cookie dough out and go through the same process covering one or two Grasshopper cookies (stack ‘em if you’d like!).  the sugar cookie dough will naturally spread more than the chocolate chip will, so be very careful not to use too much dough. (they'll be tasty, but deformed hahaha)  Reduce the time in the oven for these guys- between 6-10 minutes. 


we also tried a couple different variations: sugar cookie and oreo, chocolate chip and Grasshopper, and even a sugar/chocolate chip oreo (half and half!).  my personal favorite was the sugar cookie and oreo because it really showcased the oreo flavor, and i found it got lost among the chocolate chips in the other kind. 


all in all this dessert was so sweet, it’ll knock your socks clear off.  i don’t think it is humanly possible to eat a whole one by yourself, but these are great cookies to cut up and share. 

so i hope you enjoy these as much as our arteries did :)

Monday, May 2, 2011

a preppy easter bunny? we must be in charlottesville.

in preparation for easter (i know, i know-- that was last weekend), my friend Lindsay and i spent all day saturday baking easter treats and dying easter eggs.  it was the most beautiful day to bake with the windows open and we could step out on to the balcony and watch the hustle and bustle of 14th street from way above.  now, i don't really go all out in celebration of easter-- for my family it has always just been a holiday filled with egg hunts and dinner with all the grandparents, aunts, uncles, and cousins.  Lindsay, on the other hand, enjoys her big easter production and let me in on some of her family traditions.  one of them, which she assured me was non-negotiable for easter, was a bunny cake.

but before we get in to the confections.. let's take a look at the beautiful easter eggs we dyed!

i will mention again that i really despise eggs.  they are icky in every form unless i cannot taste them because they have been baked into a cake.  but even crepes and french toast taste too eggy for me.  so, needless to say, i do not like hard-boiled eggs either.  i think my dislike stems from getting food poisoning (or just sick) after eating eggs when i was little, and ever since i just have really not had a taste for them.  even their smell makes me cringe.

luckily, lindsay said she'd make egg salad or something out of them, so i wasn't stuck with the 18 we hard-boiled to dye.  we got two of these little dying kits-- one traditional and one glittery.  it was so much fun!  we got all the dyes ready in their cute colored cups and played around with the wax crayon making pictures and swirls.

this was always one of my most favorite parts about easter at home-- the egg dying-- so it was great fun to be able to continue the tradition on my own at school.

the glitter eggs were awesome too-- they went in to a little plastic bag and with one or two drops of this oil based dye rubbed all over, they were perfectly coated!  you could even make them tye-dyed :)


here's a look at our plethora of easter eggs, to be made in to egg salad the very next day:


so what about this bunny cake?  its actually really sweet and fun to make-- a perfect project for the kiddies!  Lindsay makes this KILLER chocolate cake from a recipe she happened upon, so we decided to make the bunny chocolate and cover him with thick white buttercream frosting, and some colored icing for his little bunny features.

to make the cake, taken from this recipe, you will need:
-2 cups boiling water
-1 cup unsweetened cocoa powder (we used 1/2 c. regular cocoa, 1/2 c. dark cocoa, yummm)
-2 3/4 c. AP flour
-2 tsp. baking soda
-1/2 tsp. baking powder
-1/2 tsp. salt (this is important!  don't skip it!)
-1 cup (2 sticks) butter, (room temperature, softened)
-2 1/4 c. white sugar
-4 eggs
-1 1/2 tsp. vanilla extract

first things first, put your cocoa powder into a heat-proof bowl and dissolve with a whisk it in the two cups of boiling water.  this may look and smell like chocolate heaven, but remember that it is unsweetened cocoa-- so it tastes bitter at this point!  i would advise against sampling it with a spoon.  let this cool (stick it in the freezer if you have room!) before you add it to any other ingredients.


next, in a stand mixer or with a handheld version, cream the butter and sugar together as usual.  add the vanilla to the mixture and then slowly add the eggs one at a time to make sure they are incorporated fully.  then, in a separate bowl, mix together your flour, salt, baking soda and baking powder.  now here's the fun part: alternate adding the dry ingredients with the cooled liquid chocolate until everything is mixed and smooth.  here's the delectable batter:


new, this recipe is really for 3 9-inch baking pans, but we used two of the big high-sided kind to make thicker cakes.  do whichever you prefer!  separate the batter into the butter-greased and floured pans. (don't know how?  watch this incredible video!) bake in a 350 degree oven for about  30 to 40 minutes (these cakes are super dense!) until a toothpick comes out clean in the center.  let these cakes cool completely before you cut in to them to make the bunny!

for the buttercream frosting, you'll need:
-1 box confectioners sugar
-1 stick of butter
-1 tsp. vanilla extract
-milk (to add a tablespoon at a time)

to make the frosting, simply cream the butter and sugar in a mixing bowl until smooth.  then, add the vanilla and one or two tablespoons of milk.  mix again and check the consistency.  if it looks like frosting to you (thick, spreadable, no lumps), its done!  you really will not need much milk because there is moisture in the butter and the vanilla-- so be very careful with how much you add!

when the cakes are cool, find a large surface big enough to hold your finished bunny cake.  its long and cumbersome, so i would recommend a large cookie sheet or platter.

the first step is cutting one of the cake rounds into the bow tie and bunny ears. you only need to make two cuts on the circle: one curve cut at the top and an identical one at the bottom. follow my picture and you'll be all set!


the middle section is the "bowtie" and the little sections turn in to the bunny ears.  feel free to sculpt away until you get the shapes you want.

next, take the uncut round and place it in the middle of your cookie sheet.  underneath, place the "bowtie", and add the ears at the top.  surprise!  it looks like an adorable little bunny rabbit!


frost it with your white frosting on all sides.  be careful because there will be cake crumbs that could get into your frosting layer!  it happened to us but we were completely okay with it-- it looked like an oreo bunny :)  decorate its face with colored icing and you will have a precious little easter bunny cake!  


why do i call our easter bunny preppy, you ask?  well because of its green-and-pink-checkered-Lilly-Pulitzer-inspired bowtie of course!  

only in charlottesville.  but i love it :)

Thursday, April 28, 2011

delightful, sweet, hallongrottor cookies!

the other day, i was in a baking mood (as seems to happen frequently when i'm procrastinating...), and i decided to make another swedish treat.  hallongrottor, or raspberry thumbprint cookies as you may know them, are soft, buttery shortbread cookies that have a delicious drop of raspberry jam in their centers.  they are really very quick and easy to make, keep well in a cool place, and definitely satisfy that sweet tooth :)

*swedish lesson!: those silly swedes call our thumbprints "hallongrottor", which really means "raspberry caves", after the little well of raspberry preserves in the middle of the cookie.  how sweet!*


here's what you need for around 30 cookies:
-1 cup of softened butter (room temp if possible)
-2 cups of flour
-2/3 c. of granulated sugar
-1/2 tsp. baking powder
-1 tsp. cinnamon
-1/2 tsp. almond extract (this isn't traditional, but i love raspberry and almond together!)
-your favorite raspberry preserves

first things first, cream the butter and the sugar in a bowl with a big spoon.  this is why you need room temperature butter-- so everything mixes up well.  don't use melted butter or your dough won't turn out with the right consistency!  

next, add the almond extract.  as i mentioned above, this is not a traditional ingredient in the dough, but i really do love raspberry and almond together in just about anything!  so this is optional-- put it in or leave it out, whichever you choose!

next, prepare the dry ingredients for mixing.  you'll need two level cups of all purpose flour, 2/3 cups of granulated sugar (as much as 3/4 c. if you like your shortbread really sweet), 1 tsp of cinnamon, and 1/2 tsp. of baking powder.  stir the dry gently in to the butter and sugar until everything comes together in a smooth dough.  throw this in the fridge for half an hour or so, just so the butter can firm up before you start to make the cookies!

after the dough has chilled, take it out of the fridge and split it in half.  take each half of the dough and roll it in to a long log shape, about 1 1/2 inches in diameter, or smaller if you'd like smaller cookies. once your dough is in this form, cut half inch slices and line them up on a baking sheet with some room in between.  check out these cuties:


next comes the fun part: the thumbprint!  i actually use my pointer finger with these cookies because they are a little too small for my thumb.  in any case, push down lightly on the cookie and make a small indentation in the center.  this is where the preserves go :)


last step before baking, the raspberry!  take some of your preserves and stir it around until its a little looser than regular jam.  with a tiny spoon, fill the "caves" you made in the dough.  


finally-- the oven!  bake at 350 for about 12 minutes, making sure to keep a close eye on the cookies.  they are full of buttery goodness, so they have a tendency to burn if you're not careful!  let them cool completely before you enjoy them (i knowwww, its such a hardship!) and store the leftovers... on the off chance that there are any :)


enjoy your little raspberry caves!