Tuesday, September 14, 2010

supper in a flash!

i love nights when i can just grab some leftovers from the fridge and reinvent them in a quick and delicious way.  with just a pot, a skillet, and the time it takes for water to boil, i can have a complete and satisfying dinner on the table.

i had half of my steak left over from the other night, so i needed to build a meal around that.  i remembered my green beans from the farmers market and blanched them in salted boiling water for about three or four minutes, until they were tender.

with the veg taken care of, i needed a starchy side.  i realized that i had brought a few side dishes from Let's Dish (check out the website.. you'll fall in love!) and pulled the "Pearl Couscous with Roasted Vegetables" side from the freezer and poured a portion of the bag in to a skillet with a drizzle of olive oil.  it cooks up in no time at all and is my favorite ready-made side from Let's Dish.


i just seared the steak for a hot second in the pan after i took out my couscous, and just like that-- dinner was served!  it took me 15 minutes, tops, and was super flavorful and very satisfying.  check it out!


enjoy!

what you should have in your pantry at all times

you may be wondering if i cook elaborate meals and have dinner parties every night.  nope, i sure don't.  i'm still a busy student and there are several nights during the week where i either have leftovers from a big party the night before, or i just whip up something quick and dash out the door.

and, i definitely have those nights where i don't feel like cooking something big.  mac and cheese is always a go-to meal for me :]  but i generally try to always have some quick things in my pantry/freezer that can be used for a million different meals or that can act as a great side in a pinch.  here's a list of some things i always have on hand:

a) Frozen veggies: i always have a good selection of bagged frozen veg in my freezer to throw in to soups, toss in a stir-fry, or just steam up to serve as a vitamin and nutrient packed side dish.  watch for them to go on sale at the grocery-- i stocked up last week when they were $0.88 per bag!  i generally have corn, broccoli florets, mixed veg, and lima beans in my freezer.  **heads up:  avoid getting the veggies in the bags that are labeled "lightly or specially seasoned" because they add an incredible amount of salt to your food (just look at the numbers!).  take the time to season them yourself when you cook them, and that way you control the salt.  

b) Purple Box Pasta:  i can't say enough good things about this product.  you should always have a box or two on hand for those nights when you just want a big bowl of carb-y goodness.  the best thing about pasta is that its versatile: you can make it italian by adding pasta sauce and parm, make it a pasta salad by tossing in some tomatoes, carrots, green peppers, and a balsamic vinaigrette, make an alfredo sauce and throw in some grilled chicken... the list goes on and on.  

c) Chicken breasts: delicious, lean protein that can be seasoned a million ways, grilled on a sandwich, breaded and pan-fried, sliced and thrown into a stir-fry, marinated and put into fajitas, added to a salad--literally anything can happen when you have chicken.  i use my organic, humanely raised chicken from the grocery and watch for it to go on sale.  when that lovely day comes, i buy up several pounds, separate it into individual portions, and freeze it for a later date.  and presto, you have chicken on hand for any occasion!

d) Fresh veggies: i have enlightened you on the virtues of the frozen vegetable, but i am certain i'll sound like a broken record if i explain how much i love and how often i use fresh veg.  i honestly go to the farmers market or the grocery and buy several different and interesting vegetables based upon what looks  the freshest, and go from there.  having chicken one night and don't know what else to eat with it?  steam up some fresh zucchini!  saute button mushrooms and a little butter in a pan!  blanch green beans!  eat raw carrots and celery!  the possibilities are endless.  

e) Spices, oils, and flavorings: never underestimate the power of spices to add variety to your meals.  i am slowly acquiring a nice spice collection of my own, but there are a few things you should always have on hand for cooking.  dried red pepper flakes spice up everything from asian marinades to chicken noodle soup.  rosemary is a perfect complement to grilled chicken as well as roasted potatoes (or roasted anything for that matter).  Invest in a pepper mill and a salt mill (or just buy those grinders from the store like i do).  olive oil is crucial.  like seriously crucial.  you can buy a lighter olive oil if you frequently saute in it, but get the good tasting extra-virgin kind if you are planning on making salad dressings or drizzling it over a meal.  in other words, if you want to taste the olive oil as an ingredient, get something that tastes good.  i also always have lemon and lime juice (in these adorable little squeezy bottles) in the fridge to add to marinades or to brighten up sauces.  

f) Baking Staples: if you are one to bake from scratch (i'm not saying i do all the time-- i like brownie and cake mix as much as the next person), there are a few things you should always have.  a small bag of all-purpose flour, granulated white sugar, light (or dark) brown sugar, vanilla extract (NOT IMITATION VANILLA!), cinnamon, and unsalted butter (in the freezer).  these few ingredients will be everything (with a few exceptions) you need to make most baked goods.  you might also invest in some baking soda and baking powder if you're a cake or muffin baker.  

and, if you have one around (no, this is not a shameless plug for my place of employment), Let's Dish is a great place to get side dishes to have with whatever meat and veggies you cook up for dinner.  they are absolutely delicious, and in my next post which will follow this one shortly, i will show you how i used one first-hand!  **P.S. college kids-- they deliver to school for free!

i hope that was helpful and that you will run right out to the store to stock your pantries and freezers :]


Monday, September 13, 2010

pizza party!

i have been waiting to make this pizza for what seems like forever!  as soon as i saw the fresh arugula at the farmer's market, i knew exactly what i would make for my little informal dinner party tonight.  there's something to be said for going to a market filled with the freshest and most colorful ingredients that just gets the creative juices flowing :]

i decided immediately to make a prosciutto and arugula pizza-- with a twist of course.

i was having friends over at 6:00 for dinner, but in order to get some prep out of the way, i made my pizza dough and pre-baked off the crusts (i made two pizzas just in case!).  i didn't make my dough from scratch, but instead used a thin crust packaged mix (which, i swear, tastes wonderful and saves you from having to proof yeast and knead for hours-- its a great short cut!) and baked them for about 5 minutes in the oven, took them out to cool, and they were ready for me to top and pop back in the oven to melt the cheese when my friends arrived.

for my "twist" on the traditional prosciutto and arugula, i added a lemon ricotta spread as the base instead of pizza sauce or pesto.  it was super simple-- just a cup of ricotta cheese (i used whole milk because part-skim was not available, but use either one!) the juice of half a lemon, salt, and pepper to taste.  on top of the spread, i placed my fresh arugula in a generous layer.


next, i added the prosciutto in a thin layer, evenly spaced around the pizza so that there is some in every bite.  i also took my heirloom tomatoes and sliced them very thinly and scattered them around.  


i finished the pizza off with some part-skim shredded mozzarella cheese right on top and tossed it in a 425 degree oven for another 7 or 8 minutes, or until the cheese gets melty and the pizza is warmed through.  i served the slices with a simple side salad with my easy vinaigrette: olive oil, balsamic vinegar, salt and pepper.

and here is the final product!  i am thrilled to present my:

Ricotta, Prosciutto, Arugula and Tomato Pizzetta 


bon appetite! 

another trip to the farmer's market

before i get in to tonight's dinner (which will quickly follow this post), i would like to take you on a tour of the highlights of what i picked up at the market this weekend:

i first made a beeline to the gnocchi lady, told her how life-changing her pasta was, and picked up a pound of fresh pumpkin ravioli to cook up this week (in a brown butter sauce of course!).


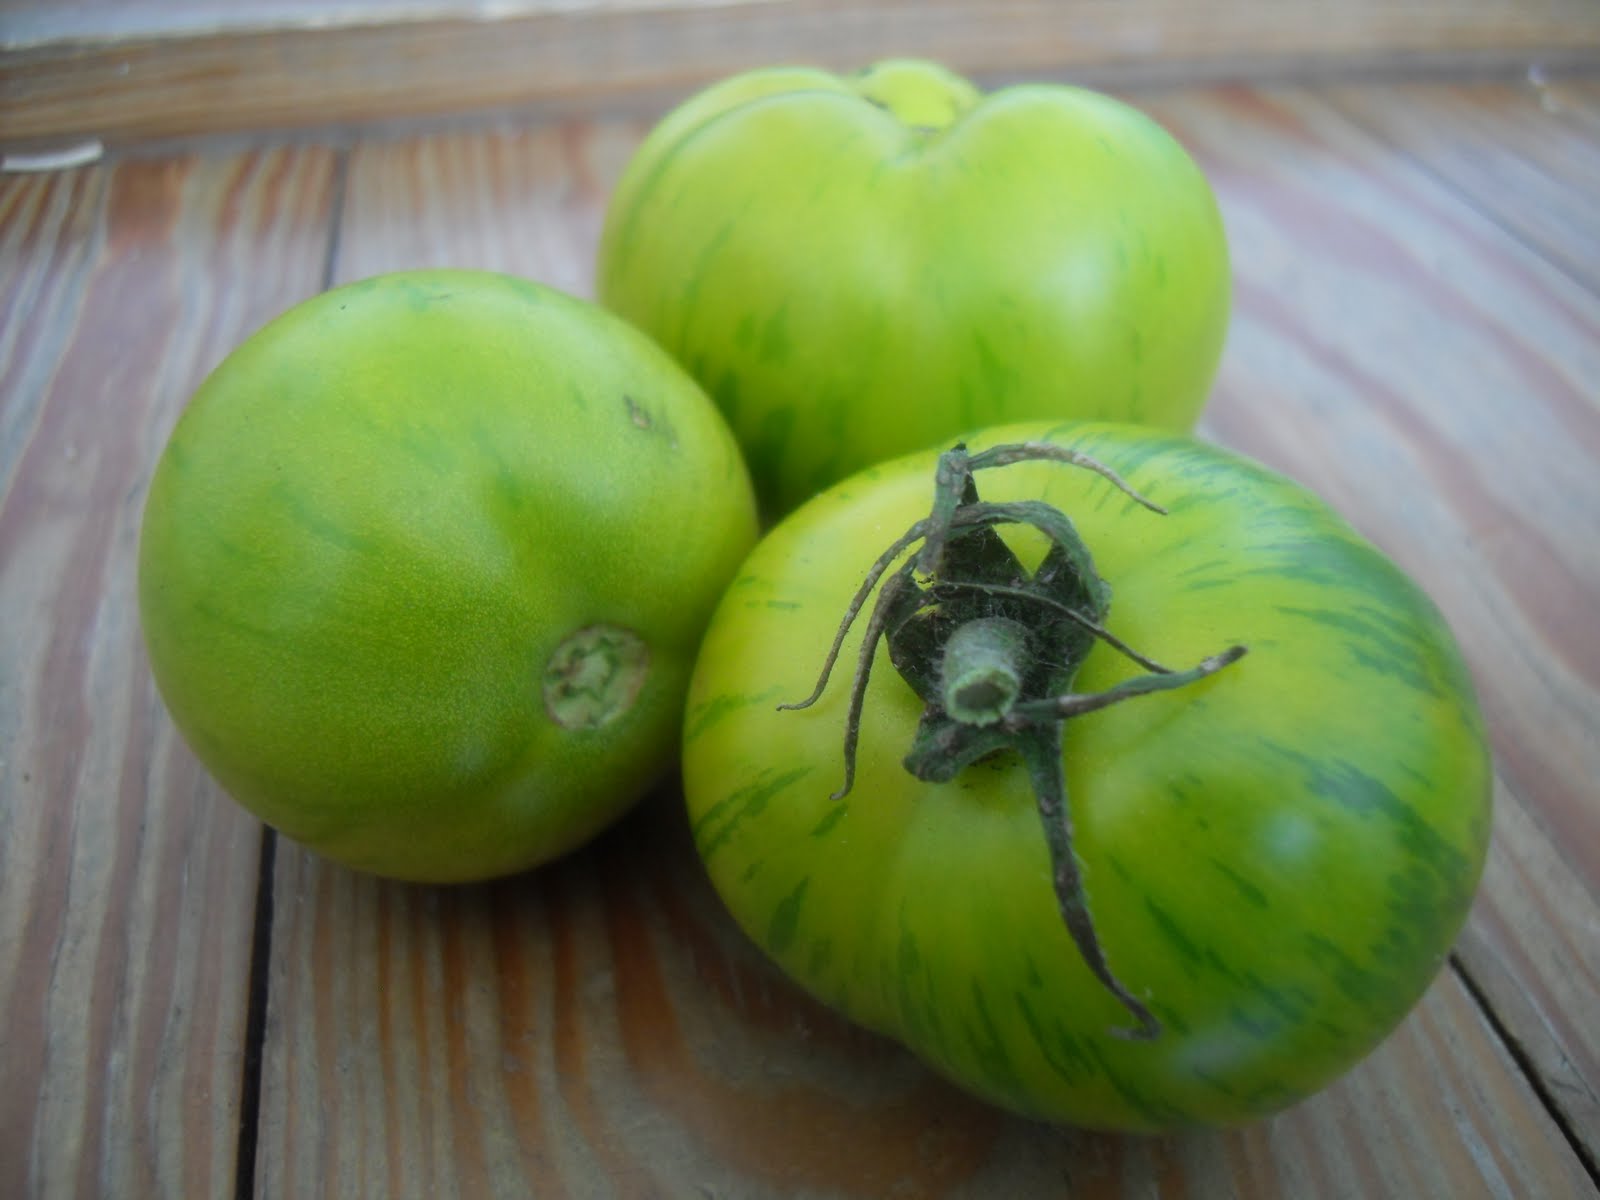
on the way to find regular tomatoes, i found these!  aren't they gorgeous?!  i didn't buy a pint this week, but instead picked up some green zebra heirloom tomatoes.


it's the very, very end of peach and nectarine season so i grabbed three small nectarines with a dessert in mind.


and, as i was walking away from the nectarine stand, my friend called out to me and said she'd just bought a pound of small plums for $1.50, and the lady selling them had one pound left.  i literally ran over to her stand and snatched them right up to use with my nectarines in a summer cake.


lastly, i picked up a bag of fresh arugula leaves to use on the pizza that i made for dinner tonight.  i bagged my own, and only paid $1.50 for almost six ounces!


in addition to all of these wonderful veggies, i bought a nice red onion, a pound of fresh green beans, and a head of garlic.  i'm looking forward to making some delicacies with these ingredients this week :]

Friday, September 10, 2010

steak dinners are good dinners.

tonight was a rough night, so i decided to pick up my spirits with a satisfying dinner.  its amazing what food can do for your mood!  tonight's menu featured my beautiful organic grass-fed sirloin steak from the farmer's market, in a lime and garlic marinade, served with roasted rosemary potatoes and fresh corn on the cob.  yum.

i had a late lunch with a friend, so i was nowhere near hungry around my normal dinnertime.  but i knew i would be hungry later (much later... i finished eating at 9:45 haha), so i decided to get my steak marinating so i could throw it on the heat when i was ready for it.  **note:  generally, beef, pork, and chicken can sit in a marinade for half and hour to overnight because they are tough enough pieces of meat to withstand the marinade for a long period of time. but if you are marinating seafood, it should not stay in the marinade for more than half an hour or it will begin to cook from the citrus or vinegar that most marinades have in them.  so watch out!**  my marinade had a splash of olive oil, a splash of teriyaki sauce (or soy will work fine), a teaspoon of minced garlic, the juice of one lime, a pinch of red pepper flakes, and salt and pepper.  i tossed my steak in to a quart-sized ziplock bag and poured the marinade right on top, massaging it around to coat the meat completely.  i placed the bag in the fridge to marinade for about three hours (anywhere over half an hour will work).

when i began to get hungry, i started preparing my potatoes.  i took the small butter potatoes i picked up at the farmer's market and cut them into wedges (about six per small potato).  i mixed them around in a bowl with olive oil, dried rosemary, salt, and pepper until coated.  then i threw them on a baking sheet and popped them in a 375 degree oven for about half an hour (or slightly more), checking on them and turning them every ten minutes.  check out these shots:

Before:

After!


with the potatoes still hot, i put on a medium pot with water to boil my corn on the cob.  in the mean time, i got my steak out of the fridge and put a skillet on the stove with a touch of olive oil on medium heat.  **note:  if you have a grill or a grill pan, by all means use them!  i do not have either in my apartment, so a skillet worked great for me**  once the water came to a boil, i tossed my corn in to cook for ten minutes.  at this point i also cranked up the heat on my pan to medium high and laid my steak in to sear.  i let it grill for about six minutes per side to achieve my desired "medium" steak (your meat will take longer or shorter to cook depending upon its size and thickness, and depending upon how you like your steak cooked).  i took my corn off the stove and out of the water, and after about twelve minutes, took my steak off as well.  it is very, very important that you let your steak rest when it comes off the grill or pan.  set it on your cutting board and leave it alone for about five minutes so that when you slice your steak, the delicious juices don't run right out of the meat and on to your board.  


when your steak has rested, take a sharp knife and slice it against the grain (aka, look at the lines on the meat and slice the steak perpendicular to the lines you see, not along with the lines) and plate it up with the potatoes and corn.  i like to put a little butter and pepper on my corn, but season it just the way you like it.  

and here's the finished product!  (complete with some slices of green onion for color... Ms. Kwami would be so proud!)


buon appetito!

holy gnocchi!

okay, so tonight's dinner was a complete success.  and the best part is that it was light, refreshing, and the summer flavors were a perfect complement to a gorgeous day of sunshine and a cool breeze.

i was so, so lucky to have found the woman with the fresh pasta at the farmers market last weekend.  she was so well hidden down a brand new line of vendors that i nearly walked right out of the market without even seeing her.  maybe it was the food gods that spun me around with curiosity and marched me right over to her stand.  and then i spotted the holy grail:  fresh, soft, fluffy gnocchi.  she sold me an entire pound for a mere $5 and, after assuming that i had no idea how to cook these little babies, warned me again and again not to overcook them.  i kindly informed her that gnocchi is one of my all time favorite things in the entire world and that i made them at christmastime with my uruguayan grandmother, thankyouverymuch.  haha, i hope she reads this blog and is satisfied with how i prepared her fresh pasta :]

on the menu tonight was a trip to italy:  my beautiful gnocchi enrobed in the fresh pesto i made earlier (see my post entitled "presto, pesto!"), and a simple tomato and mozzarella salad.  i cant think of a better combination of flavors!  oh, and the entire meal took a scant 15 minutes from fridge to table.

i started by boiling a large pasta pot of water (salted!) for my gnocchi.  while the water boiled, i took the pesto from the fridge and added about 2/3 of a cup to a large bowl and added a few tablespoons of olive oil to loosen it up.  i then grabbed a tomato from the farmer's market and sliced it into fairly thick pieces and halved each one, and sliced some fresh mozzarella into similarly sized pieces.  **note:  here's a great tip for slicing fresh mozzarella--put it in the freezer for five minutes before you are ready to slice it to make it slightly firmer.  This way, using a sharp serrated knife, the cheese will hold together more easily and will cut with much less effort!**  i alternated tomato, cheese, tomato, cheese on a small platter and drizzled the salad with olive oil, salt, and freshly cracked pepper.


once the water came to a boil, i dropped the whole pound of gnocchi right in the pot, stirring once.  your gnocchi will cook slightly differently depending upon its density and freshness, but you'll know its done when the dumplings rise to the top of the water.  once all of the gnocchi are floating, take them out immediately!  this is where the pasta lady warned me not to overcook them, and she is absolutely right.  overcooked gnocchi taste like wallpaper paste.  drain the gnocchi and put them right in to the bowl with the pesto, and stir gently until all the dumplings are coated.  

serve with your favorite wine or sparkling water, put on an italian cd, open the windows for a cool breeze, and you'll totally feel like you're in italy!  


enjoy this delicious dish and enjoy the last tastes of summertime!

Wednesday, September 8, 2010

crazy for peach and blueberry crumble!

before i begin, i would like to apologize.  last night i threw an "elegant" dinner party for my beautiful Virginia Belles, but in all the commotion, I forgot to take photos.  we dined on rotini (the purple box kind of course!) with a spicy tomato sauce that had the fresh chorizo from the farmer's market stirred in, all topped with freshly grated parmesan cheese.  we also had fresh farmer's market green beans sauteed in garlic and olive oil (and a little butter for flavor!), and finished with toasty garlic bread.  it was delicious-- and i am so sorry that i did not capture the moment on my trusty camera.


i did, however, remember to take photos the other night when i made a light summer-y crumble with the peaches i picked up at the farmer's market.  read all about it!

for the filling: i started with two white and two yellow peaches (very ripe!) from the farmer's market (there is no real reason for two white and two yellow other than that they both looked fresh and yummy when i picked them from the stand at the market), and a half-pint of blueberries.  i gave them a good wash and dry.  in a glass square baking dish, i cut the peaches in to bite-size chunks and tossed them around with the blueberries and a little lemon juice.


i then added just shy of a half-cup of sugar (do this to taste-- if you fruit is super sweet, you can back down on the sugar even more, or vice-versa) and a quarter-cup of flour.  mix this all together until the fruit is nicely coated.  **note: why put flour in with your fruit filling?  when the fruit starts to bake in the oven, it will get soft and start to release its juices.  the flour is there to absorb the juice and keep your crumble from being runny!**


for the crumble:  this is a very simple topping for a crumble or a crisp, and you can play around with the spices depending upon which fruits you are using.  for this peach and blueberry crumble, i combined a cup of flour, 1/4 cup of white sugar, a 1/4 cup of light (or dark if you prefer) brown sugar, a pinch of salt, and a generous sprinkling of cinnamon.  the most important part of this crumble topping is one stick of cold butter: make sure it is good and chilly before you add it in small pieces to the flour mixture!  now get your hands in the bowl and mix everything together until its all incorporated nicely.  pat this mixture right on top of the fruit filling.


pop this in to a preheated 350 degree oven for around 45 minutes, checking every 15 minutes.  when the crumble is ready, you should see the fruit bubbling and a nice golden crust on top.  here's how mine turned out!


i recommend serving this summer treat while it is still warm with a little scoop of vanilla ice cream.  but, i wouldn't object to having this the next morning for breakfast with a mug of tea, either :]


i hope you enjoy this as much as my roommates did!