Wednesday, March 23, 2011

crispy, crunchy, crabby cakes

i know, i'm the worst.  i have been slacking on updating lately, and i sincerely apologize!  i've been cooking just as much as usual, but my trusty camera has just not captured the delicacies.  when i realized the other day that i hadn't posted on here in almost a month, i decided that enough was enough!  so, without further ado, let's get cooking :]

i've been thinking about seafood a lot in the last couple of weeks-- really craving some good fish.  but The Krog has not had the best looking selection lately, so i've avoided trying out my new seafood recipes.  the other day, i was walking by the fish counter and spotted crab meat-- AH.  i love crab!  i love cracking it out of its shell, i love crab boils, i love crab warm, or cold, and i even like imitation crab.  i knowwww, everyone always tells me that imitation crab is disgusting.  well, i do not believe it.  it has its place (in crab noodles, but that is for another time), but it does not belong in crab cakes.  and crab cakes were on the menu in my mind!

now, to make a good crab cake you have to be willing to get good ingredients. and good ingredients can be pricey, i'll warn you upfront.  in my opinion, the only good crab for a crab cake is lump crab meat, not claw meat.  lump crab is soft, comes in big chunks (or lumps.. hence the name!), and is exxpenssivveeeee.  but really excellent crab cakes don't have a ton of fillers and breadcrumbs like the ones you get in the frozen food section.  they are almost entirely crab!  so splurge a little and make sure you get good quality crab meat.


there are only a few more ingredients in my succulent crabby cake: (makes 4 or 5)
-6 oz. lump crab meat
-6 or 8 butter crackers, crushed (I used the Town House ones because I had them in my pantry)
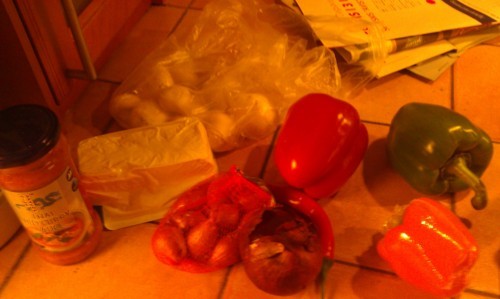
-1/2 bell pepper, small dice
-2 or 3 green onions, chopped
-1/4 c. reduced fat mayo
-squeeze of lemon juice
-salt & pepper
-flour for dusting
-olive oil for pan frying

*note: this cake is very delicate, so make sure to fold your ingredients together carefully so you don't shred your lump crab meat!

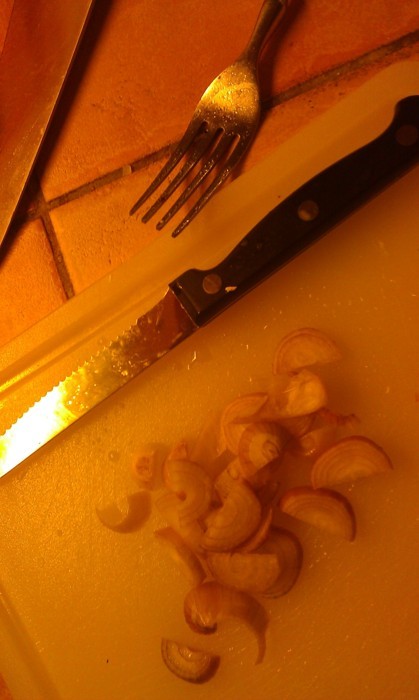
first get your veggies ready to toss in.  dice half of a sweet bell pepper (I used an orange one) and chop 2 or 3 green onions, using the white and green parts.  next, crush your crackers up into small pieces.  don't mash them into dust, but you don't want huge pieces, either.  they should look like this:


next, take your beautiful lump meat and toss in the mayo, peppers, onions, cracker crumbs, and lemon juice.  fold gently and add salt & pepper to taste.  

at this point, if you have made crab cakes before, you might be wondering where the egg is.  i thought about using one as a binder (to keep the cake together), but the mayo and the cracker crumbs did such a good job that i thought i would save a few calories and a whole ingredient, and skip the egg.  the crab cakes are still very delicate and can break easily, but that is also the case if you use an egg.  

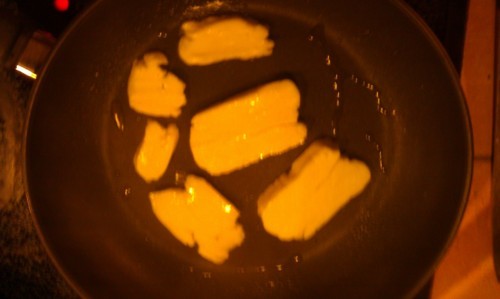
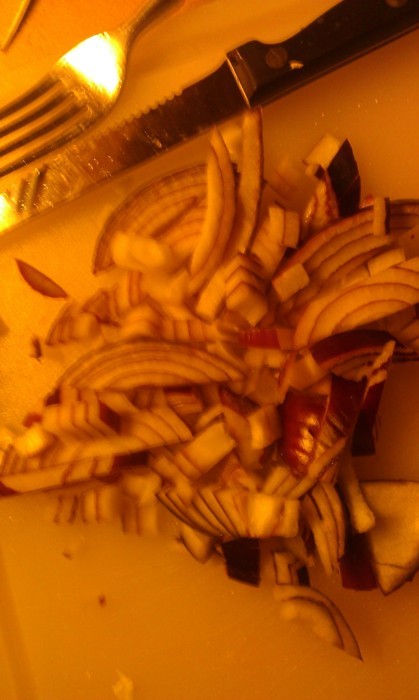
here's what the mixture looks like!

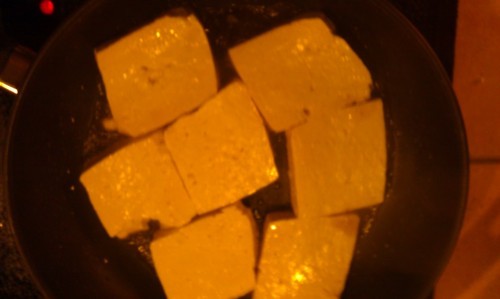
the next step is to get a skillet on over medium-high heat with a good coating of olive oil in the bottom.  put a little pile of flour on a plate to dust your cakes.  then, take your crab mixture and gently form a palm-sized amount into a fat disk shape.  place your cake into the flour and coat it lightly on both sides.  this will give the finished crab cake a nice crispy outside.


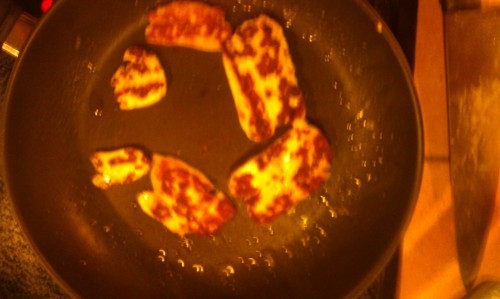
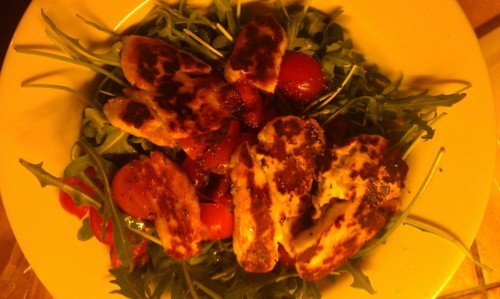
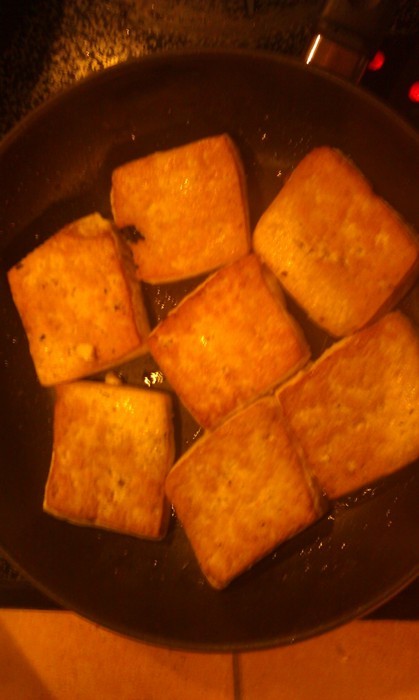
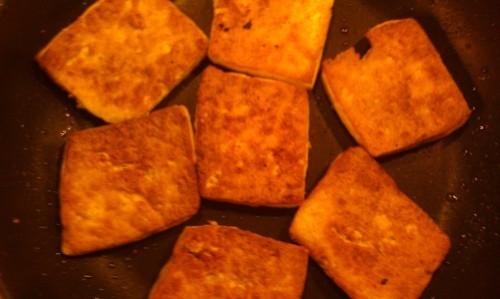
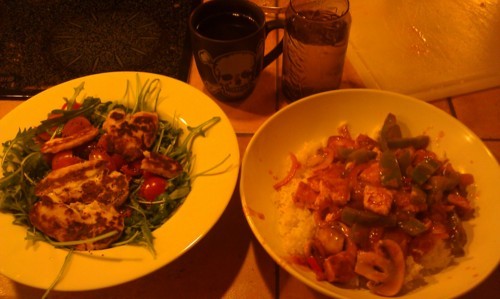
make sure your oil doesnt get too, too hot while you're pan frying!  also, don't overcrowd the pan.  if you have a smaller skillet, just cook two at a time so you have room to flip.  after about three or four minutes, flip the crab cakes over very gently with a spatula.  once you're all done, this is what the beauties look like-- golden brown and delicious.


i served my crab cakes with some greens, a quick pasta salad, and homemade cocktail sauce (which is really just ketchup, horseradish, and lemon juice!).  i hope you enjoy this springtime meal!

Sunday, February 27, 2011

asian invasion part deux-- orange chicken!

sorry for the delay.. but here is part two of the asian invasion of my blog!

this is one of the most successful recipes i've made so far at school.  i improvised slightly with my ingredients because i didn't have exactly what i needed, but i'd say it came out even better than expected.  oh, yeah, and IT TASTED EXACTLY LIKE REAL CHINESE FOOD (except for the minor fact that i did not fry the chicken).

here's what you need for the incredible sauce:
-3/4 cup water
-1/2 cup orange mango juice (i used the Naked brand because it was in my fridge)
-the juice of one orange (+ zest)
-a splash of lemon juice (few tbsp.)
-a splash of soy sauce (few tbsp.)
-1/8 c. white vinegar
-1/2 c. brown sugar (packed)
-1/2 tbsp. minced ginger
-1/2 tbsp. minced garlic
-2 tbsp. chopped green onion
-1 1/2 tsp. chili garlic paste (adjust to your taste!)
- 3 tbsp. cornstarch
-2 tbsp. water

this sauce is quick and simple (although it looks like it has a lot of ingredients-- they are all pretty common!).  start by chopping your ginger and garlic very finely and zest the orange.  in a medium size bowl, combine the water, orange-mango juice, freshly squeezed orange juice, vinegar, and soy sauce together.  next, add the brown sugar and stir until it is well incorporated and there are no lumps.  then add the chili garlic paste (like siracha or this more chunky version that i loveeeeee) to your taste (add more or less depending upon your spicy tolerance!).  lastly, add in the ginger, garlic, orange zest, and chop a few green onions for color and a little crunch.


while the sauce sits and the flavors combine, take two fresh chicken breasts and cut them into bite-size pieces.  as you know, i like the organic and humanely raised brand at The Krog.  its considerably more expensive than regular chicken breasts, so use whatever you have or like to buy, but i always feel better about what i eat when i buy organic meats.

in a skillet, drop a little bit of olive oil and sauté the chicken until it is brown and crispy on all sides. don't cook it all the way through because it will continue to cook in the sauce.  


once the chicken is browned, take it out and set it aside.  in the same skillet, add the sauce to the pan and simmer it on medium-low.  while it simmers, in another little bowl stir 3 tbsp. of cornstarch into the 2 tbsp. of water and stir vigorously until it is combined, making sure there are no lumps of cornstarch in the bowl. (* you just made a slurry!  this will be used to thicken the sauce!). when the sauce is bubbling, add the slurry and stir quickly.  right before your eyes, the sauce will begin to tighten up.  


at this point, add the chicken back to the sauce and finish cooking the meat right in the sauce.  *note: watch your temperature while you have the sauce on the stove-- make sure it is on low to medium low!  there is a lot of sugar in this particular sauce and it can burn easily!**


after about two or three minutes simmering in the sauce, your meal should be done!  serve the chicken in its sauce over a steamy bed of white or brown rice with the vegetable of your choice-- (or some wonton soup :] )  top with some fresh green onions and you have a chinese take-out meal to die for!

Friday, February 11, 2011

asian invasion-- wonton soup!

chinese food is absolutely delicious.  i crave it all the time and can eat it multiple times in one day.  however, i refrain from doing so very often for multiple reasons.  number one, chinese food is an expense that i don't need on my wallet (even though my trusty yuan ho is super affordable).  and two, it is nutritionally horrid for you.  yes, you can make "good choices" at a chinese restaurant and order off the icky bland diet menu, but who wants to do that?

so, this week i decided to whip up two of my favorite chinese dishes at home and see how close i could get them to the original.  i started by making steamy wonton soup and then finished with an incredible version of orange chicken (in my next post!).  here we go!

to make the wontons, you'll need:
-one package of fresh wonton wrappers
-1/2 lb. of shrimp (i used thawed pre-cooked shrimp from the freezer section)
-2 tbsp. chopped cilantro
-1 1/2 tbsp. soy sauce
-1 tsp sesame oil (go easy on this, its really strong!)
-2 tsp. chopped ginger (use more or less to your taste!)
-1 egg white

traditionally, wonton soup has a pork filling but i decided to use shrimp instead because i always have some in my freezer.  some people use raw shrimp in the filling, but i am wary about it cooking all the way through since the wontons take such a short time to boil.  eyeball about half a pound of shrimp (thawed) and toss it in your food processor (or magic bullet).  pulse it gently until the shrimp is chopped in very small pieces.  *note:  if you don't have a food processor, just use a knife and mince the shrimp by hand!

next, add the soy sauce, sesame oil (again, this is strongggg so go easy on it!), chopped cilantro, and minced ginger (use more or less to your taste!)  stir it all together and the filling is all done!

take your wonton wrappers (i like the square ones-- you can find them in the refrigerated section in the produce area, around where you'd look for tofu) and lay them out on a large work surface.  keep a damp paper towel over the unused wrappers so they don't dry out as you work!

using a regular cereal spoon as a guide, spoon about a tablespoon of filling in the center of each wonton wrapper.


now that the filling is in place, take a little bowl of water and, using your finger, wet two touching sides of the wonton and fold the wrapper over, pressing the wet and dry sides together.  the wonton should look like a triangle!  then, pull the pointy sides down and forward gluing the back of one pointy side to the front of the other pointy side with a drop of water (see this step here!, i forgot to take a picture!).   


my batch of filling made 22 wonton total, but yours could make more or less depending upon how full your fill your dumplings.  here's some of mine, all done and ready for the water!


some people like to boil their wontons in the broth, but i've heard that it makes the finished broth cloudy. so i like to boil my wonton separately and float them in the steamy broth when the time is right.  put on a large pot of water to boil making sure you plenty of room for the wonton to float around.  drop them in six at a time for a mere three or four minutes, until the wonton wrappers are translucent and flexible.  fish them out and let them cool on a plate.  they look delicious!


now for the broth-- you'll need:
-a box or two of chicken stock (i use the natural, 33% less sodium kind)
-two slices of ginger root
-one big garlic clove, sliced in half
-small bunch of cilantro
-two or three green onions
-crushed red pepper flakes
-soy sauce
-a dash of sesame oil

the broth of wonton soup is KEY.  it has to taste super flavorful and not just be a weak chicken broth with nothing exciting about it.  so my solution is to infuse regular chicken stock with tons of great aromatics.  the reason i say you'll need one or two boxes of stock is because it depends upon how many people you're serving.  if you want a lot of soup, infuse two boxes of stock.  if you want enough for 4 as a big appetizer or soup course, just use one box.  *note: if you're using two boxes of stock, just double the following steps!

very simply, take a small bunch of cilantro (whole, not chopped), three green onions (in thirds), two slices of fresh ginger, one large clove of garlic (just cut in half, not chopped), a splash of soy sauce, a dash of sesame oil, and red pepper flakes to taste.


let this simmer on the stove on 'low' for about 15 or 20 minutes.  this way, all the delicious flavors will infuse into the broth and make a great soup for the wontons!  at the very end, strain out all the aromatics and you'll be left with a spicy broth.

after the broth has simmered, add as many wonton as you'd like to the pot to reheat them (just for a minute!) and serve it up in a large bowl.  i like to eat my wonton soup with a side of rice and a few green onions sprinkled on top.


YUM.  enjoy this appetizer!  and keep a look out for my next posting... orange chicken :]

Saturday, January 29, 2011

cypriot salad and spicy thai curry-- straight from norway?

i am absolutely brimming with pleasure to share with you a guest-blog post straight from oslo, norway, and the creative culinary mind of my darling brother.  this fantastic thai-curry recipe is on my menu for this week, and i hope it will be on yours, too.

enjoy!
------------------------------------

from his own blog:

I have been meaning to document the minutiae of my life in oslo but have been hard pressed for time and/or energy to do it justice... until now. Or something.

My saturdays almost always follow this basic template: wake up around 11am or noon, putz around a bit in the apartment, either playing guitar or watching tv on my laptop, then getting cleaned up (usually) and heading out for errands, coffee and new yorker at tim wendelboe, grocery shopping at a good ethnic shop a few blocks away, and back home, highly caffeinated, to start cooking dinner.

This is a sacred ritual.

I am fond of this routine, and it is necessary: most grocery stores are not open on sundays; I have usually run out of food by saturday; I have time to make a leisurely and time consuming dinner; and after 20-24 hours without food but filled with caffeine, I am HUNGRY. So, for my one meal of the day, I usually go as all-out as my minimal cooking skills allow me to.

I have been meaning to do a guest post on my sister's food blog, piquant plates, for quite some time, so while i was making dinner today I documented every step in excruciating, jittery cell phone camera detail. This is what I produced, and how I produced it.

First, my grocery list:


For main dish:
Thai red curry simmer sauce
Tofu
Mushrooms
Shallots
Red onion
Various bell peppers and one hot pepper
Rice (long grain, i used Basmati)


For salad:
Arugula
Cherry tomatoes
Halloumi cheese
Olive oil
Black pepper

1. Arugula, tomato, and grilled halloumi cheese salad
This is as simple as can possibly be: apportion some arugula (more is better, don't skimp) and place in a bowl with quartered cherry tomatoes. Slice the halloumi cheese into slices with regular thickness (easier said than done, not that important).


Heat a small amount of olive oil in a skillet on medium heat and place the slices into the pan. Spread the oil around to give each piece a light coat, and grill for a minute a side AT MOST. It cooks very fast, and all you really want is a nice golden brown color.


Take the cheese out of the pan, place on top of the arugula, pour a small amount of olive oil over top, and sprinkle black pepper on top. Done. No salt, the cheese is already quite salty, and I don't recommend using any dressing other than a little oil.


Unbelievably delicious. A meal on its own, if you are foolish enough to eat more than one meal a day.
Now is a good time to mention multitasking. If you don't do it, you're a crap cook and probably a crap roommate. Plan out your meal, make sure you have the right utensils, knives, plates, bowls, and pans beforehand. Clean as you go. God help you if you leave a bunch of dirty dishes in the sink afterward. Seriously. The sixth level of hell should be reserved for dirty dish leavers.


For this, i am using one small pot and lid for rice, one large skillet for the vegetables and simmering, and one small skillet for cooking the halloumi and, afterward, the tofu.


I have let my rice soak while making the salad, and after 15 minutes, I've turned on the burner to get the water boiling. Make as much or as little rice as you like, whatever variety you like, follow whatever recipe you like. I am surprisingly bad at making rice, considering how easy it is, so I have almost no advice for you there.


While the rice is soaking or coming to a boil, it's tofu time.


Yeah, yeah. Everyone hates tofu. Haters be hatin'. This is an absolutely key ingredient to keep it veg but also delicious... tofu soaks up all the delicious curry flavor and, when done well, can have a nice texture. First open the tofu, drain it in the sink, and if you wish, press it for 10 minutes to make it firmer and more absorbent. While you do so, add some more oil to the skillet you used for halloumi (a decent amount this time) but keep it on medium heat, maybe a bit lower (I was on roughly 5-6 of 12 on my electric range). Slice the tofu into half-inch squares and add to the pan.


Tofu takes a surprisingly long time to cook, and you don't want to cook it too hot or it will get black on the outside and still be kind of soft on the inside. You want to make sure the oil is hot when you put it in, and let it go at least 6-7 minutes a side, and don't hesitate to keep flipping it until it looks like each side is golden brown and sealed up. when it has that nice seal, it will have a good texture on the outside but still be soft enough inside to soak up the other flavors. Close to done:


Done:


While the tofu is going, it's time to chop vegetables. Get a small bowl out for storage. First: shallots.


Next: red onion. I half-julienned this and half chopped, but I have no idea what I am doing so frequently make a mess of it. It makes almost no difference.


Next: CLEAN UP, YA PIG.


Next: mushrooms and peppers.


Put them all in the big skillet, with a dash of oil, and bring it up to medium to get the vegetables cooking. You don't want them to sautee, really, because you still want some of the fresh crunch of the vegetables. By the time you've done all this, the rice should be well on its way, and the tofu should be about ready. Take the tofu out and cube it, like so:


If you've sealed it properly it should hold up pretty well. Add it to the skillet with the vegetables:


Then add the sauce. I suppose you could make the curry sauce yourself at home from scratch, if you are an old Thai grandmother, but much to my chagrin I am not one. If one finds oneself an American of Uruguayan descent in Norway making Thai curry, well, one has to make due.


Let this simmer on the high side of medium for a few minutes while you clean and make sure the rice is finished. Not too long, you still want the veggies crunchy, but long enough to let the tofu soak up all the flavors. Mine looked roughly like this:


Now cover the rice in this deliciousness and serve authentically: with that Cypriot salad you never got around to eating while you were making the curry; a glass of water; and a weak whisky and coke in a skull-and-crossbones coffee mug (incidentally, that may be the only truly authentic thing about this dinner).


And there you have it. Not a bad way to spend a Saturday afternoon, plus there are enough leftovers for 2-3 more dinners.

Tuesday, January 25, 2011

eclairs eclairs ECLAIRS!

while home over break, i wanted to take advantage of my fully equipped kitchen and bake something that i didn't think my tiny kitchen at school could handle.  i also wanted to make something brand new that i had never attempted before, and try it out on my family before i fed it to my friends.

i'd had a crummy day at work and came home one afternoon ready to bake.  for christmas from my lovely grandmother, i got a beautiful kitchen aid hand mixer with all sorts of fun attachments-- making the possibilities endless.  after a quick inventory of ingredients in the kitchen, i decided to make eclairs.

i was a bit intimidated to make eclairs because the dough is particularly finicky.  it's one of those things that has about a 10 second time window where if everything doesn't go exactly right, the whole batch is ruined.  but, fear not-- i made them perfectly on the first try-- which means you can too!  it really is much simpler (and less daunting) than i originally thought.  let's get started!

what you'll need for the dough:
1 c. skim milk
1 stick butter (room temp if possible)
1/2 tsp. salt
1 1/2 tsp. sugar
1 c. AP flour
3 eggs (plus 1 more in case you need it)

The dough is nearly fool proof, if you have all your ingredients out, measured, and ready to go.  It just takes a few steps.  First, in a medium pot, add your milk, sugar, salt, and butter.  Bring it to a rolling boil while you stir.


Now here's where you need to work quickly: when the mixture hits a boil, immediately take it off the heat and add your flour, stirring constantly and quickly until all the flour is mixed in.  Put the pot back on the heat and keep stirring the dough for about 30 seconds to sort of "cook out" the raw flour flavor.  At this point, i took my dough out of the hot pan and put it in a large glass bowl, spreading it out up the sides to help it cool.


*Note: why does this dough need to cool?  We are going to finish it off by adding eggs in the next step.  If you added cold eggs to a hot dough right off the stove, as soon as the eggs hit the heat, they would start to cook.  No one wants scrambled eggs in their eclairs!

After about 10 minutes of cooling down, its time to add the eggs! (and time to use my mixerrrr!!)  One at a time, crack each egg into the dough, making sure to mix on medium-low speed and incorporate each egg completely before you add the next one.  Depending on your dough, you might need to use 3 or 4 eggs.  After three eggs, if the dough doesn't easily fall of your beaters in a slow, but thick ribbon, add your 4th egg.   and voila!  you just made choux dough!  


pop this mixture into a piping bag, or a gallon-size zip bag and snip a small hole in the corner.  on a lined baking sheet (preferably lined with silpat), pipe small (or large) eclair shapes with the dough, about an inch apart.  


bake these beauties in the oven for 10 minutes at 425 degrees, and then back down the oven to 375 and bake them for another 15 minutes (keeping an eye on them through the door of the oven).  beware: do not open the oven door while the shells are baking!  if you do, just like a souffle, the eclairs will deflate.  you'll know they are done when they are puffed up and golden brown on the tops.  


while the shells cool, its time to make the filling.  you can make a serious custard filling if you'd like, but for me its too many calories and too much work.  instead, i took custard-flavored jello cook & serve pudding and reduced the milk from 2 cups to 1 1/4 cups to make the end product thicker.  at the very end, just before filling, i gently folded in some cool-whip to the custard for creaminess.  

now, to fill these bad boys, you can either fill them properly with a pastry bag and a tip, or just poke a hole in the front of the eclairs, pop your filling in another ziplock bag, and fill them that way.  


but wait, where's the chocolate?!  don't worry, i definitely made ganache :]  its a two second process:  take a cup of semi-sweet chocolate chips and melt them down in the microwave with a few tablespoons of heavy whipping cream (or whole milk).  Once melted, add more cream until it gets to a silky and shiny consistency.  either dip your eclairs right in the chocolate, or drizzle the tops! 


these will be a HUGE hit at a cocktail party, baby shower, birthday celebration, or just for a casual tea with some girlfriends!  i hope you enjoy them as much as i did!


Saturday, January 22, 2011

who doesn't love mexican food? (and a great dessert?)

happy new year, everyone!  i apologize for my lack of posting, but i was working almost constantly over my month-long winter break and didn't have time to post my latest culinary treats.  but fear not, i did remember to take pictures of them all :]

as a bit of a "last hurrah" before winter break, my first-year roommate came over for a casual dinner party i was throwing in the middle of exams.  i invited beth, of course, because the menu for the evening was mexican-inspired (her favorite!) and one of my roommates joined us as well.

we popped over to The Krog to pick just a few necessary ingredients knowing that we would be leaving for a month and didn't want to have leftover ingredients or food in the fridge.  being a total planner, i worked out the perfect menu that would make a delicious dinner for that night, and a "round-two recipe" (as Sandra Lee would call it, ugh) for lunch the next day.  i also planned a quick and delicious dessert that would use up the milk and bananas in the fridge.

Here's all you'll need for a complete dinner for 4 (plus enough for our round-two recipe!):
-A fresh rotisserie chicken
-Whole wheat tortillas
-A can of black beans
-A jar of good salsa (i like it medium or hot)
-1 box of mexican rice (here's my favorite kind!)
-1 bag of frozen sweet corn
-Shredded mexican cheese
-cilantro (optional, but delicious!)

Chicken and black bean wraps with Mexican rice and sweet corn:


whenever someone asks me what i like to whip up in a pinch, this is the quickest, most delicious weeknight meal i can think of.  the rotisserie chicken is a great time saver and pretty inexpensive.

start by getting the rice cooking on the stove according to the package directions.  this is the part that takes the longest when preparing this meal, so once the rice is fluffy, it's pretty much time to eat!   while that steams, drain the can of black beans and rinse them in a colander.

then, its time to "pick the chicken"!  take your rotisserie chicken and pick it apart, gently shredding it as you go.  i like to use the entire chicken for this meal (since i normally feed around 4, plus we need leftovers for tomorrow's lunch!) so i combine the white and dark meat together.

in a medium pot, add your chicken, rinsed black beans, and an entire jar of salsa.  stir them gently until they are combined.  turn the stove on to medium heat and heat until the whole mixture is warmed through.  in another small saucepan (or the microwave), steam the frozen corn until hot.

now its time to assemble!  take a tortilla and place a small handful of shredded mexican cheese down the middle.  take a nice scoop of the chicken, salsa, and black bean mixture and spread it right on top of the cheese.  top with a fresh sprig of cilantro for perfect mexican flavors, and roll it up into a wrap!  serve this with the steamed sweet corn and the fluffy fiesta rice.  voila!


now for a quick and easy dessert (that perfectly used up the last of my milk and bananas in the fridge!) you'll need just a few things:

-Cook & Serve chocolate pudding mix (make SURE you get cook & serve and not instant!!)
-2 cups of skim milk (or whatever you have on hand)
-fresh raspberries and bananas (again, whatever you have on hand)

this is really fool-proof.  follow the directions on the pudding box and cook the chocolate pudding on the stove until it is warm, bubbly, and thick.  keep and eye on it while it cooks and stir it so that it doesn't burn on the bottom!  while it cooks, wash and slice your fruit into bite sized pieces.  when the pudding is done, pour it into individual bowls, top with fruit, and enjoy!


* * * *

now, i promised you a great lunch idea for your leftovers.  this is super simple and doesn't require a SINGLE extra ingredient (okay, except some Pam).  get ready for a fiesta chicken quesadilla.

very easy to make.  start out with a large skillet and preheat it to medium.  take a large tortilla and cover it with a thin layer of mexican cheese.  then, use the rest of your filling from last night and spread it out right over the cheese layer.  


top the filling with another layer of mexican cheese (to make the layers stick to each other!) and close the quesadilla with another tortilla.  

take your skillet off the heat and spray it with a spritz of Pam spray.  carefully transfer your quesadilla to the pan and cook four or five minutes per side, or until the tortilla is brown and crispy, and the filling/cheese are hot and gooey.

take the quesadilla out of the pan, whack it into 4 big wedges, and share it with a friend for lunch!  serve alongside a salad or leftover rice and corn-- or just eat it as is!


i hope you enjoy this mexican-inspired meal as much as i did-- twice!