 but before we get in to the confections.. let's take a look at the beautiful easter eggs we dyed!
i will mention again that i really despise eggs. they are icky in every form unless i cannot taste them because they have been baked into a cake. but even crepes and french toast taste too eggy for me. so, needless to say, i do not like hard-boiled eggs either. i think my dislike stems from getting food poisoning (or just sick) after eating eggs when i was little, and ever since i just have really not had a taste for them. even their smell makes me cringe.
 luckily, lindsay said she'd make egg salad or something out of them, so i wasn't stuck with the 18 we hard-boiled to dye. we got two of these little dying kits-- one traditional and one glittery. it was so much fun! we got all the dyes ready in their cute colored cups and played around with the wax crayon making pictures and swirls.
  this was always one of my most favorite parts about easter at home-- the egg dying-- so it was great fun to be able to continue the tradition on my own at school.
 the glitter eggs were awesome too-- they went in to a little plastic bag and with one or two drops of this oil based dye rubbed all over, they were perfectly coated! you could even make them tye-dyed :)
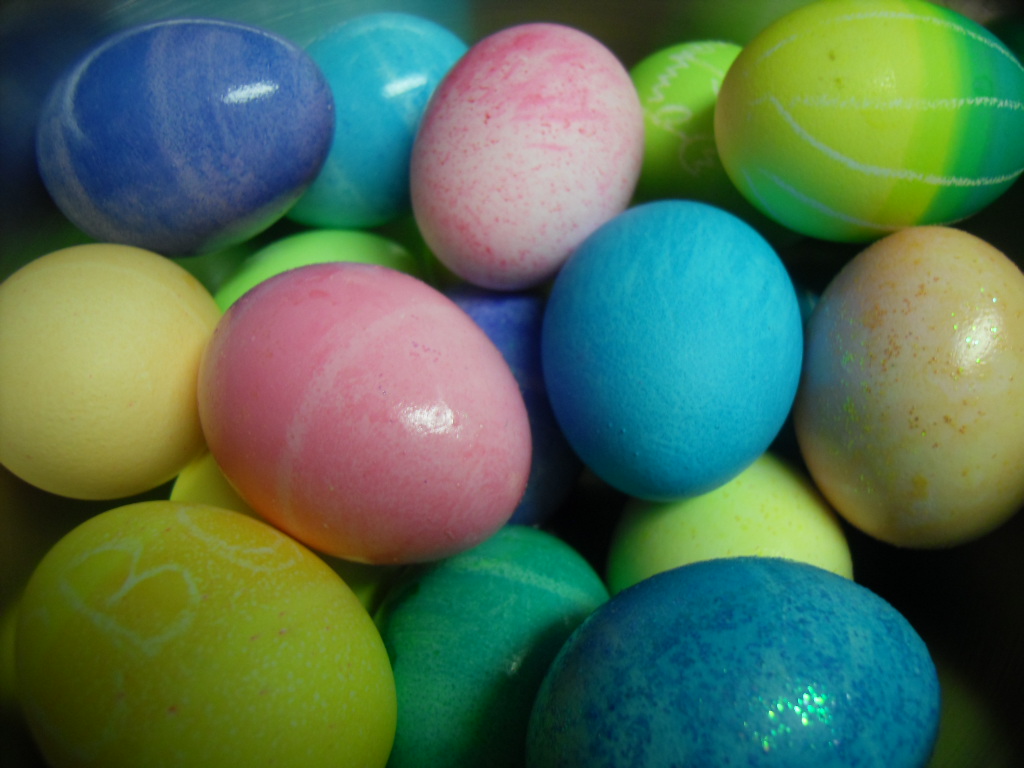
here's a look at our plethora of easter eggs, to be made in to egg salad the very next day:
so what about this bunny cake? its actually really sweet and fun to make-- a perfect project for the kiddies! Lindsay makes this KILLER chocolate cake from a recipe she happened upon, so we decided to make the bunny chocolate and cover him with thick white buttercream frosting, and some colored icing for his little bunny features.
to make the cake, taken from this recipe, you will need:
-2 cups boiling water
-1 cup unsweetened cocoa powder (we used 1/2 c. regular cocoa, 1/2 c. dark cocoa, yummm)
-2 3/4 c. AP flour
-2 tsp. baking soda
-1/2 tsp. baking powder
-1/2 tsp. salt (this is important! don't skip it!)
-1 cup (2 sticks) butter, (room temperature, softened)
-2 1/4 c. white sugar
-4 eggs
-1 1/2 tsp. vanilla extract
first things first, put your cocoa powder into a heat-proof bowl and dissolve with a whisk it in the two cups of boiling water. this may look and smell like chocolate heaven, but remember that it is unsweetened cocoa-- so it tastes bitter at this point! i would advise against sampling it with a spoon. let this cool (stick it in the freezer if you have room!) before you add it to any other ingredients.


new, this recipe is really for 3 9-inch baking pans, but we used two of the big high-sided kind to make thicker cakes. do whichever you prefer! separate the batter into the butter-greased and floured pans. (don't know how? watch this incredible video!) bake in a 350 degree oven for about 30 to 40 minutes (these cakes are super dense!) until a toothpick comes out clean in the center. let these cakes cool completely before you cut in to them to make the bunny!
-1 box confectioners sugar
-1 stick of butter
-1 tsp. vanilla extract
-milk (to add a tablespoon at a time)
to make the frosting, simply cream the butter and sugar in a mixing bowl until smooth. then, add the vanilla and one or two tablespoons of milk. mix again and check the consistency. if it looks like frosting to you (thick, spreadable, no lumps), its done! you really will not need much milk because there is moisture in the butter and the vanilla-- so be very careful with how much you add!
when the cakes are cool, find a large surface big enough to hold your finished bunny cake. its long and cumbersome, so i would recommend a large cookie sheet or platter.
the first step is cutting one of the cake rounds into the bow tie and bunny ears. you only need to make two cuts on the circle: one curve cut at the top and an identical one at the bottom. follow my picture and you'll be all set!

the middle section is the "bowtie" and the little sections turn in to the bunny ears. feel free to sculpt away until you get the shapes you want.
next, take the uncut round and place it in the middle of your cookie sheet. underneath, place the "bowtie", and add the ears at the top. surprise! it looks like an adorable little bunny rabbit!

frost it with your white frosting on all sides. be careful because there will be cake crumbs that could get into your frosting layer! it happened to us but we were completely okay with it-- it looked like an oreo bunny :) decorate its face with colored icing and you will have a precious little easter bunny cake!

why do i call our easter bunny preppy, you ask? well because of its green-and-pink-checkered-Lilly-Pulitzer-inspired bowtie of course!
only in charlottesville. but i love it :)
No comments:
Post a Comment